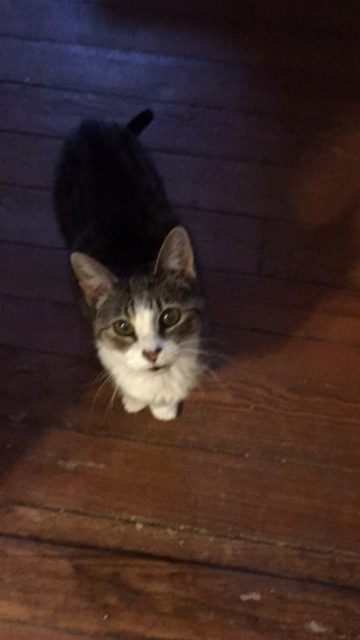
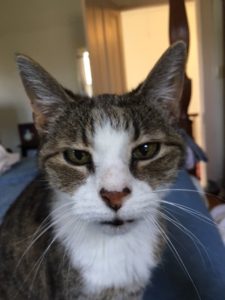
Tough Mama – Seven Pounds of unadulterated, furry GRIT accurately describe Kitty Girl. At approximately 77 in human years, she retains her youthful, innocent looks, her insouciance, and screaming impatience. Her deceptively sweet face (which covers up a general ‘badass-ness’) and coy affect have served her well over the years.
I have asked her again and again how it came about that she was left to wander the alleys and byways of our neighborhood. I get a blank stare, followed by a lick of the paw, as a reply. She CAME to US, though! We kept hearing the screeching yells of a tiny cat who kept coming around and around.
She did tell me that she wanted to be picked up, fed and adopted.
“Don’t we all,” I said.
We fed her for months. Eventually she let us get close enough to nab and hustle her off to the vet. There was much family discussion about her status. Was she “with kittens” or had she just gained weight? SHE wasn’t talking. Our veterinarian resolved the conflict, telling us that Kitty Girl had been fixed and had been well-treated by somebody.
“Great! We have another pet,” we said to ourselves, not anticipating Kitty Girl’s complete antipathy for any other animal. Her motto was and is, “No Animals Other Than Me – With Me, It’s My Way or NUTHIN'” She was quite effective in her demonstration of her ethos in her insane attacks on our other pets.
So, with our usual inventiveness and aplomb, we foisted her off on my Mother, who, God Bless Her, reluctantly agreed to take her in. Thus, began a mutually unhappy relationship that lasted for about 12 years. There was much consternation over Kitty Girl’s leaping onto tables, weaving through lamps, statues, collectors items, detritus, as well as attacking the occasional visiting dog (especially her nemesis, Buckley). In fairness, Kitty Girl tried to mitigate Mom’s dislike by bringing her dead mice and chipmunks, but that didn’t cut any ice.
Buckley
After many long years of co-existing with my mother in their perfunctory relationship, we brought her back. Our other pets had passed away and we felt honor-bound to try and set things right. Kitty Girl agrees that we have finally stepped up and given her due.
What amazes me is her tenacity and outstanding survival skill. I mean, she has had to be TOUGH to survive living by her wits and then living with my Mother. Talk about having EGO STRENGTH and a WILL to OVERCOME — SHE’S GOT IT!!
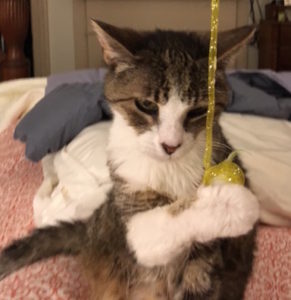
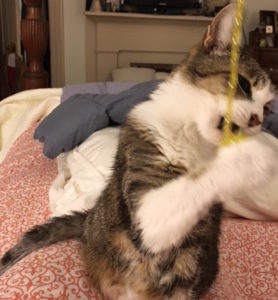
Even at 77 she still likes to play and rough house. I hear her feral hunting whines and cries as she pounces on toys and tries to tear them apart. On one of her first nights in our old house she brought me a love token of a half-dead mouse at about 3 a.m. It was pretty terrifying to be awakened by the wild screams of both animals and a little mouse dropped right beside my head. But, the girl’s gotta do what the girl’s gotta do, right? I only hope that I can make that same claim when I reach her age (not hunting for mice). It’s inspiring to see someone who still holds onto that fierce spirit and keeps on truckin’!
I know that she is an ANIMAL, but, I have learned a lot from this little Tough Mama. Kitty Girl looks at me and says, “Me-Rew! You’re damn straight I’m tough!”
Here’s to Kitty Girl and Staying in Touch With YOUR BAD SELF in 2018!
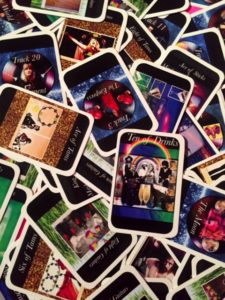
Ashley has worked hard to put together a great ETSY store.
Here are some of her cards!
Like many others, I’ve chosen, and the economy chose for me, a varied career path, as opposed to staying with one career since I graduated college eleven years ago. The side hustle list is long from television post production to screenwriting to substitute teaching to running the aforementioned an Etsy store, which I’m confident I will continue for years to come.
My Etsy store is called kissmytarot and you can find it at
My store sells hand designed tarot cards and personal tarot card readings. Right now, the site features a hand designed set of Fleetwood Mac tarot cards and Stevie Nicks inspired tarot card readings.
Last Christmas I looked online for a set of Stevie Nicks tarot cards to send my friend for Christmas, only to find that they didn’t exist, so it occurred to me to make some myself and I did. It then occurred to me that others may want some as well, and the idea for an Etsy store planted in my head.
Below, I’ll explain how I started and some tips I’ve learned along the way.
Starting Out: Product Attention, Research and Need
I put a lot of time into designing my first set of cards before I even considered opening the store to sell them. I showed them to people, got tips, made adjustments and spent a lot, a lot of time getting them in fighting shape. I also went to a local print shop to get a quote on how much it would be to have them printed so they looked professional and neat. If I had found out each deck was going to be $100 a piece to print, I would have stopped, because its unlikely people would pay over a hundred dollars for a deck of cards, let alone a little more to make a reasonable profit.
I also researched other tarot decks and made sure something else similar to my product wasn’t already on the market. There wasn’t, so I moved forward with a reasonable thought that people might be interested in buying. Now if you make something that has been made before, don’t be discouraged, but focus on what makes your product different and think about that while designing your store and focusing your marketing.
Starting Out: Etsy Research
I also did some extensive Etsy research before I started out. You can type Etsy into YouTube and find hundreds of howto videos on how to start, how to sell and other great tips. My favorites were by an Etsy best seller named Olivia Hayward. You can type her name into YouTube and find tons of great how to Etsy shop videos. You can also go to the help section of Etsy and find beginner’s guide to selling and guides on how to open your store. There’s also a Etsy Success podcast. As a site and business, Etsy has a ton of resources and you should definitely look into them before you jump in.
Jumping In: Finances and Time
Before you start, you should think about how much time and money you plan on putting into your Etsy endeavor. Etsy itself is fairly inexpensive and has very little overhead, which is great. For every “listing” or product you post, you pay about 20 cents a month, which isn’t a lot. I only have three listings at the moment, so my overhead is low, but if you, for instance, sell 30 different types of pins or buttons and want to do 30 listings, be aware you will be paying more.
I do not recommend buying thousands of dollars worth of product before your store has even opened, even if you’ve sold the products elsewhere. I waited for my first order and then bought a moderate amount, about $250 worth, so if it didn’t do well, it wasn’t a devastating loss. You will most likely have to put money in before you get it back, so also factor that in.
I also decided I was willing to put in a lot of time upfront and then back off to upkeep about 3 times a month with general vigilance. I advertise about once a month and obviously put in time when I have an order I need to send out. Have an idea of how much time you want to put in before you start.
Getting Your Store Started:
Essentially, listen to Etsy here, they know from which they speak. They will tell you-Create a good shop page, a good bio, a good about you page, get great pictures for your shop page and great product pictures. The pictures included here are professional pics I got taken for the page. Look up other Etsy pages similar to yours that have done well and study how they put their pages together. And do all this before you make your page and products public. It’s tedious, and one might hope that your product is so great people will buy it based on a small description alone, but its really not so. Buyers expect a pristine and well thought out page and it pays to do that now instead of later.
Advertising
It’s really vital that you have a good handle on social media before you open an Etsy store, as most if not all of your advertising will be social media based. It makes sense to advertise online since you’re opening an online store, and I also think it pays to study some online marketing and things like Google Analytics before you start.
Create pages for your store particularly on Facebook and Instagram. I created a Twitter page for my store and just found that Twitter didn’t make a lot of sense for something so visual so I let the Twitter slide. See what works and what doesn’t.
You also want to be as specific as possible. If you’re making tiger bracelets, join every tiger and wildlife and bracelet group on Facebook and other social media outlets you can find, because you already know the people on those groups have an interest in something relating to your product, but don’t just jump in the groups and immediately start advertising. People will see through that and it will create more negative feelings than good. The rule is five points of engagement for every point of advertising. In other words, you interact with people in the group without bringing up your product on five separate occasions for every time you bring up your product or page.
Patience and Being Realistic
Even though it seems easier than opening a store on Main Street, and it is, having an Etsy store requires a lot of patience and realistic thinking. You will put in a lot of work before you make a sale and you will need to continue that work for many sales after that. It can take from 2 months to a year or longer to make your first sale and even longer to break even, but I think the time is worth it to own your little business and make some side money. Please please do not quit a job or other source of income in leu of your Etsy store, especially if you haven’t opened it yet. Look at your Etsy store as a fun way to learn sales and earn some extra money, and remember it takes everyone a good long time to get started and gain a customer base.
And my last tip is to not be afraid to bring up your store and products in public and online conversation. I understand the impulse to stay quiet, but no one will ever know about it if you don’t bring it up yourself. Good luck and don’t forget to head to www.etsy.com/shop/kissmytarot and pick up some tarot cards, a reading or some playing cards. Thanks!
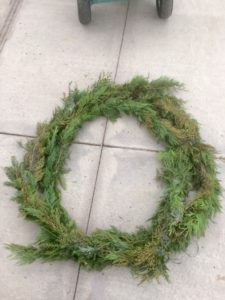
Garlands have a magical quality! Seeing these branches, leaves or flowers strung together and hanging over mantels, or doorjambs like ribbons, invokes a sense of nostalgia and happiness — there is something about that sight that makes your eyes crinkle as you smile.
Garlands, bands of plant material that are strung together, date back to ancient times. They had universal appeal — Egyptian, Greeks, Romans, Hindus, Pagans and pretty much every other civilization incorporated them into their religious and festive occasions. That tradition remains strong today, but, they are probably most popular during “The Holidays,” and, are mostly evergreen (symbolizing everlasting life).One fun fact – looped and/or draped garlands are called “festoons” or “swags.”
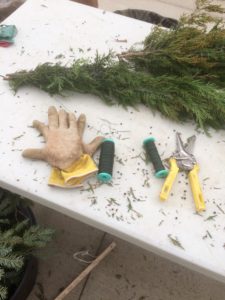
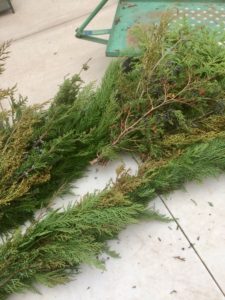
So, my uber creative friend, Caitlin, has demonstrated how to create your own little piece of magic on a shoe-string budget.Her garland was 10 yards and she used black string and green floral wire to string branches of cedar, leyland cyprus and arborvitae together. If you look carefully at the picture, you will see that she filled 5 seven gallon buckets with plant material.You can use tufts and branches of shrubs and trees and if you cannot find enough you can add anything that you want, includingornaments, sparkly ribbon, fruit and more.You can add as much swag to your SWAG you as like!
What you will need to make the basic garland:
Snippers
Gloves
Any kind of evergreen tuft or branch – lots of them
Floral wire
Black string
Any extra items or bling that you make want to add to your garland
7 gallon buckets filled with evergreensWire the branches together in clumps and then tie the clumps end to end.
I have conquered one of my own, personal, Betes Noir. I have journeyed deep into a culinary jungle, found what I was looking for AND…come out UNSCATHED. I have made a cake that is vegan and gluten free! Voila! This feeling is not dissimilar to the one I had after making a delicious Beef Wellington, although the dishes are POLAR opposites.
I may LOVE Cake, but I ADORE Icing! So making cakes is something that I enjoy, despite the fact that I don’t bake very often. I have been long fascinated, however, by the concept of vegan and gluten free baking. I did a little research and found that the concept of veganism goes back a long way (some 2000 years), but the term was coined in 1944 by Vegan Society Founder, Donald Watson. Similarly, going gluten-free, emerged as a dietary treatment for celiac disease in the 1940s.
So, both of the concepts have been around for a very long time, but, you knew THAT!
On to the cake-making! Since I don’t have any cookbooks that are specifically vegan or gluten-free, I went to the web to find a recipe. I found a site, the Minimalist Baker, (https://minimalistbaker.com/) with tons of great recipes, and decided to adapt their recipe for a Gluten Free Birthday Cake (Vegan). While their dessert was chocolate, I decided to make a Coconut Cake. To my way of thinking, Coconut Cake is very festive, and reminiscent of The Holidays.
I also used some different ingredients, substituting:
Coconut milk for Almond Milk
Coconut flour for Oat Flour
Almond flour for Almond Meal
and, made some other small changes.
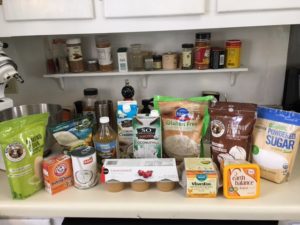
This is my “Cast of Characters,” ingredients in a recipe for success!
Not being completely familiar with the different properties of all the ingredients, I was not sure if it would wind up being a delectable dessert or a big old brick. But, it seems that I lucked out and, using the Minimalist Baker’s directions as a guideline, made a most excellent sheet cake!
Here’s the recipe:
HOLIDAY COCONUT CAKE (VEGAN)
Prep time
40 mins
Cook time
30 mins
Icing time
15
Total time
1 hour 15 mins
CAKE
1 cup (240 ml) unsweetened plain coconut milk
1/4 cup coconut creamer
1 1/2 tsp apple cider vinegar
4 flax eggs (4 Tbsp (28 g) flaxseed meal + 10 Tbsp (150 ml) ice cold water)
1 Tbsp (7 g) baking soda
1/2 cup (120 ml) canola oil
1 TBSP agave nectar
2/3 cup (133 g) sugar (half cane sugar and half coconut sugar)
1 1/2 cups (369 g) unsweetened applesauce
1 tsp pure vanilla extract
1 tsp coconut extract
1 tsp kosher salt
1 tsp baking powder
1 cup (110 g) almond flour
1/2 cup (45 g) coconut flour
1 1/2 cups (240 g) Pillsbury Gluten Free Flour
ICING
3 large scoops Earth Balance
1 lb of organic powdered sugar
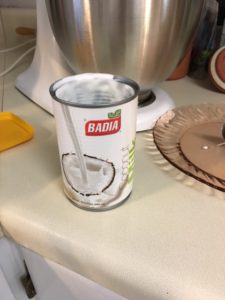
1/3 can coconut cream (or full-fat coconut milk*)
Coconut Creamer to taste
1 tsp vanilla extract
1 tsp coconut extract
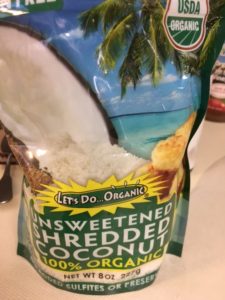
Gluten Free Coconut
Instructions
1.Preheat oven to 350 degrees F (176 C) and butter 1 sheet cake pan
2.Measure out coconut milk in a liquid measuring cup and add vinegar. Stir and let curdle while moving onto the next step. This adds a nice little tang to the batter.
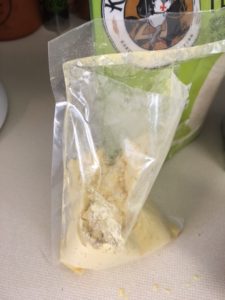
3.Prepare flax eggs by mixing ice cold water with flaxseed meal in a large mixing bowl and let rest for 5 minutes.
Flax meal to make eggsThe flax eggs
4.Next, add baking soda to the coconut milk vinegar mixture and stir. Set aside.
5.Add the oil, cane sugar, and agave nectar to the flax egg and beat/whisk to combine.
6.Next, add applesauce, vanilla, and salt and beat/whisk to combine. Then add coconut mixture and whisk again.
7.Lastly, add baking powder, almond flour, coconut flour, and gluten-free flour and beat/whisk to combine, making sure no large clumps remain.
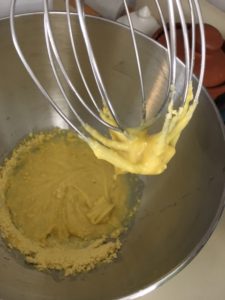
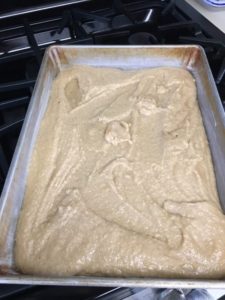
Batter Up!
8.If the batter appears too thick, add a touch more coconut creamer, but it should be perfect. It should resemble a semi-thick batter that’s pourable.
Ready to go into the oven.
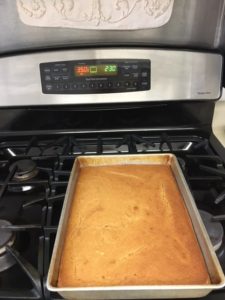
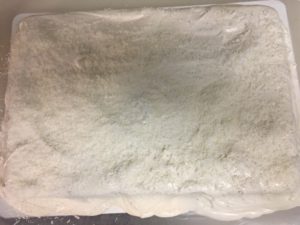
9.Bake cake for 30-40 minutes (cupcakes for about 28-35 minutes) or until a toothpick inserted into the center comes out completely clean and the edges appears dry. (Time will vary if you subbed ingredients, as well as depending on the size of your pans.) Mine baked in 31 minutes.
It smells delicious!
10.Let cake rest in the pan for 15 minutes, then carefully run a butter knife along the edges and invert onto a cardboard cake board. Let cool completely.
(I used a cake board because I am going to serve the dessert on a platter.)
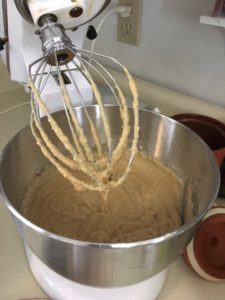
In the meantime, prepare your Coconut Icing.
This is wonderful!
11.Combine Icing ingredients in a mixer — start with the Earth Balance, gradually adding the powdered sugar. Alternate canned coconut cream and sugar, adding salt, extracts and coconut creamer to taste. Whip the mixture at the highest speed until it’s fluffy and delicious!
12.Ice cake and sprinkle with coconut.
NOTE: I absolutely LOVED using the canned coconut cream in the icing! It
extremely calorie-laden (100 calories per 1/4 cup), but adds such a nice, rich
texture! I mean this is COCONUT CAKE…..!!!